
Connecting Shopify with Amazon enables you to leverage the strengths of both leading e-commerce platforms, giving you the opportunity to reach more customers and maximize your sales potential. If you're already running a store on Shopify and looking to expand, integrating with Amazon is a smart strategy. The integration process has been streamlined, making it easier for Shopify merchants to sell across multiple platforms. In this article, we will guide you through the steps to connect Shopify to Amazon, discuss the benefits of this integration, and show you how to unlock new growth opportunities for your business.
Benefits when connecting Shopify to Amazon
Connecting your Shopify store to Amazon will bring several benefits to your business:
- Increased reach: Amazon is a massive online marketplace with millions of customers worldwide. By connecting your Shopify store to Amazon, you can reach a larger audience and sell your products to them.
- Diversified sales channels: Integrating Shopify with Amazon creates additional sales channels, reducing the risks from platform rule changes, algorithm updates, or market shifts.
- Brand exposure: Selling on Amazon increases brand visibility, attracting more customers to your Shopify store. Even if a customer doesn't purchase on Amazon, they may discover your brand and visit your store to explore your products.
- Analytics and insights: Amazon provides valuable data on sales, customer behavior, and business performance. By linking Shopify with Amazon, you can access this information to make more informed decisions and optimize your sales strategy.
- Cross-promotion opportunities: Promoting both your Shopify store and Amazon listings can help attract more visitors. This cross-promotion can result in increased sales and better visibility on both platforms.
- International expansion: Amazon's global reach makes it easier to expand into international markets without needing to establish physical stores in multiple regions. Connecting your Shopify store to Amazon simplifies selling to customers worldwide.
Requirements for integration between Shopify and Amazon
Integrating Shopify with Amazon is not too complex, but there are some basic requirements to ensure the process runs smoothly. Here are the key steps to follow before starting the integration:
- Active Shopify store: You need an active Shopify store with products available for purchase.
- Amazon seller account: You must have an Amazon seller account. If you don’t already have one, you can create one through Amazon Seller Central.
- Product listings: Ensure your products on Shopify are properly set up, with clear descriptions, high-quality images, and accurate prices.
- Compliance with Amazon policies: Familiarize yourself with Amazon’s rules and guidelines. This includes knowing which categories your products fit into, how to format your listings, and what items are prohibited from being sold.
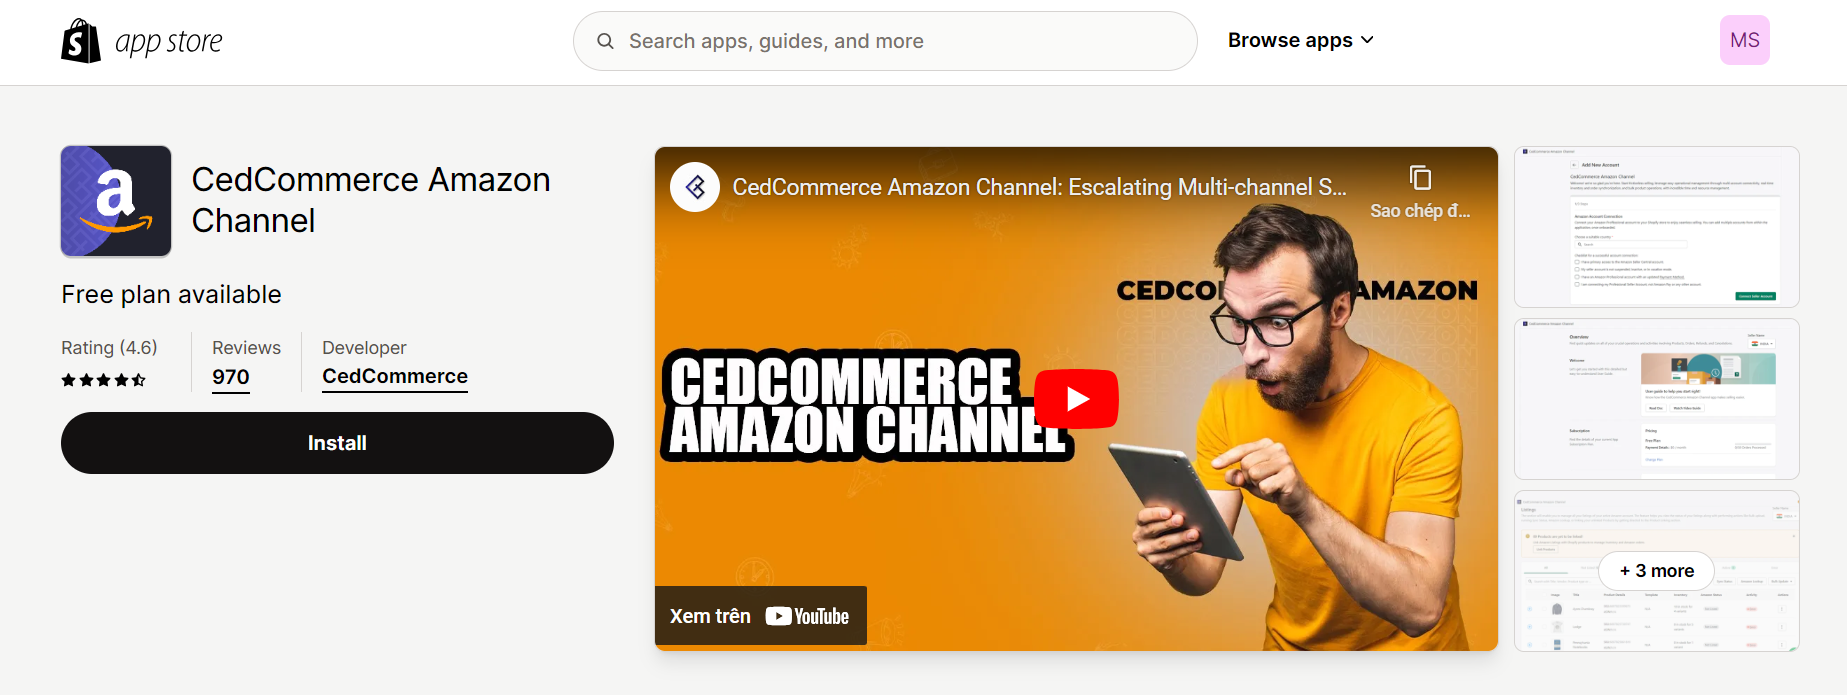
- Integration app: Choose a reliable app or service to connect your Shopify store with Amazon. Several third-party apps are available in the Shopify App Store to help with this integration.
- Product syncing: Use the integration app to sync your Shopify product catalog with Amazon. This ensures that your product details, images, stock levels, and prices are transferred from Shopify to Amazon.
- Account permissions: Grant the integration app access to both your Shopify and Amazon seller accounts so it can manage and sync your data.
How to connect Shopify to Amazon
Method 1: Integrate directly
Step 1: Register an Amazon Professional Seller Account
To register for an Amazon Professional Seller Account, visit the Amazon Seller Central website (sellercentral.amazon.com).
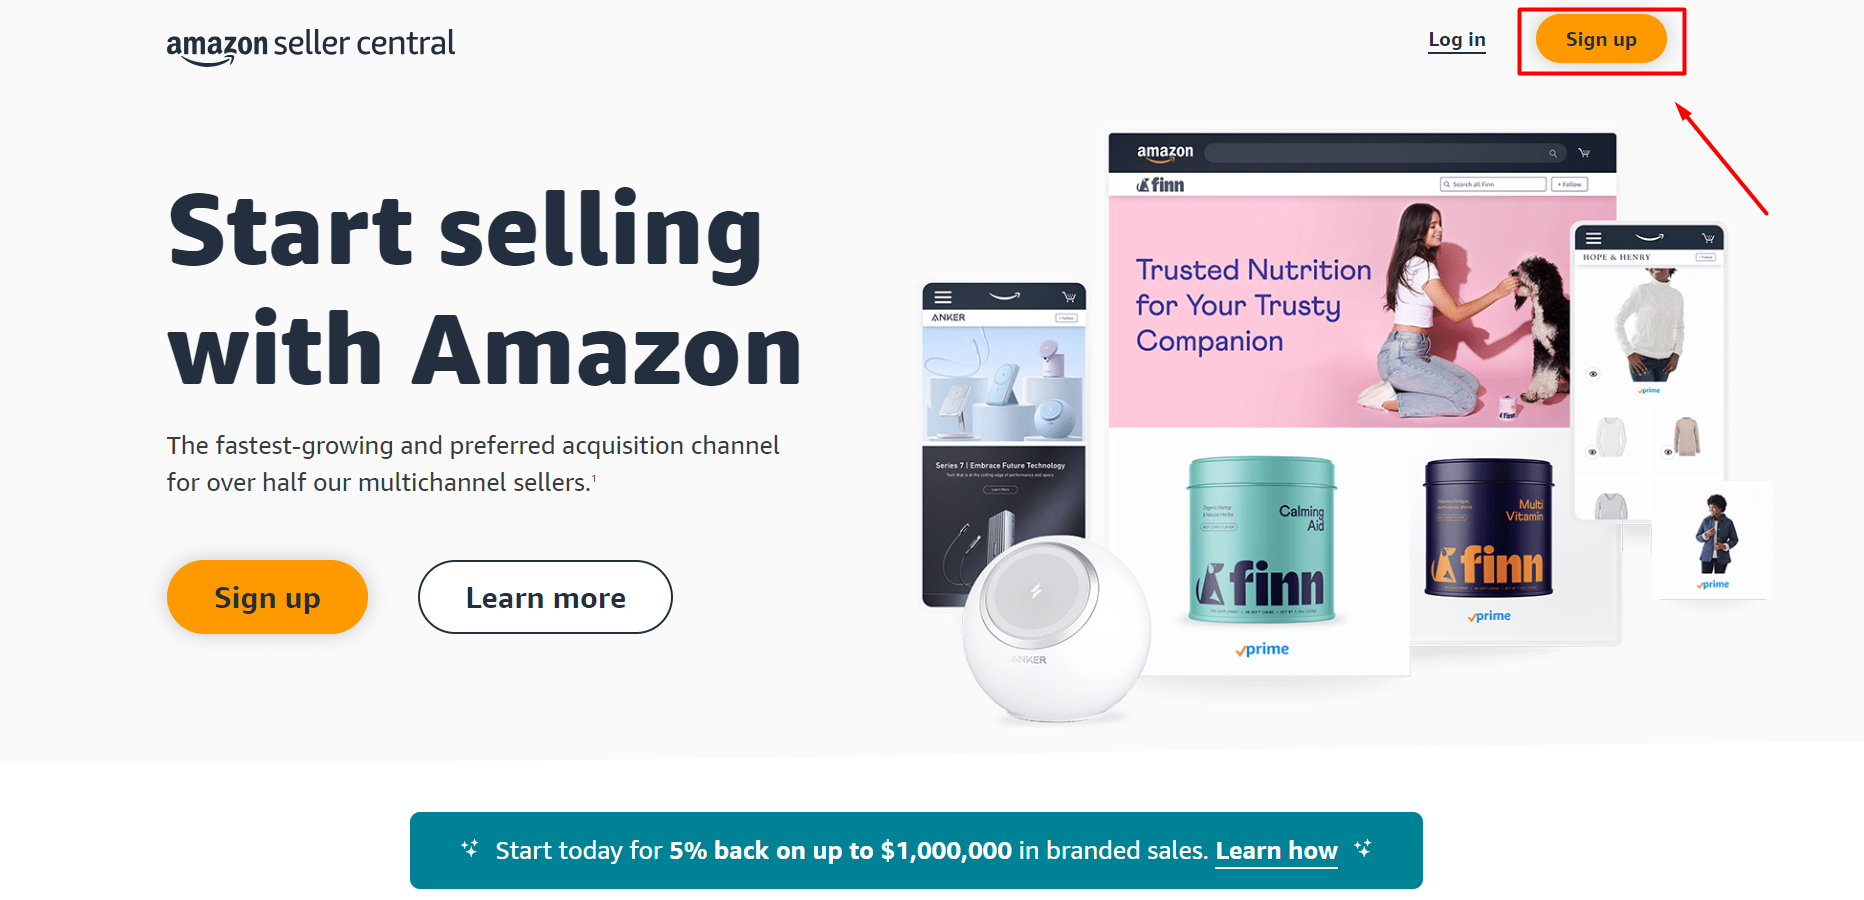
If you already have an Amazon account, log in using your existing credentials. If not, click on "Create your Amazon account" and follow the instructions to set up a new account. Once logged in, you'll need to provide your business details, such as:
- Your name
- Your address
- Contact information
- Tax details
Make sure to keep this information handy for later use. After filling out the required information, follow the prompts to complete your registration. You may be asked to check your email and submit additional documents, such as a government-issued ID or business license, to finalize the registration process.
Step 2: Check for category approval
After setting up your professional seller account, follow these steps to check for category approval:
- Verify with Amazon that your selected products are permitted in the categories you've chosen.
- If your product is restricted, Amazon will notify you. You may see a message indicating that you need approval to list products in that category.
- If you want to list products in a restricted category, request permission from the product listing page.
- Click "Request Approval" and follow the instructions to submit your request.
- Provide accurate and relevant details to support your request for category approval.
- Wait for Amazon to review and approve your request.
- To check if your category approval request is approved, go to the "Inventory" tab and click "Manage Inventory".
- Find the product you are waiting for approval on.

If it’s still pending, you will see a note about its status. Once Amazon tells you your request is accepted, you can start listing products in that category.
Step 3: Optimize Shopify store
Before linking your Shopify store with Amazon, it's important to ensure your store is fully set up for smooth and efficient selling. Check these factors to prepare your store:
- Update product descriptions and images: Ensure your descriptions are clear, concise, and keyword-optimized. Use high-quality photos from various angles to make your products more appealing.
- Optimize product titles: Create clear, descriptive titles that include relevant keywords to help customers find your products easily in searches.
- Organize product categories: Organize your products logically into categories, making it easier for customers to find what they're looking for in your store.
- Mobile optimization: Ensure your Shopify store is optimized for mobile devices, as many shoppers now make purchases on phones and tablets.
- Add customer reviews: Include user reviews and ratings on your product pages to build trust and credibility. Positive ratings can significantly influence potential buyers.
- Implement SEO best practices: Use appropriate keywords in your product descriptions, titles, meta tags, and URLs so search engines can easily find your products. Craft catchy descriptions to attract more clicks from search results.
Properly setting up your Shopify store will ensure better functionality, improved user experience, and higher sales, giving you a strong foundation for successful selling on both Shopify and Amazon.
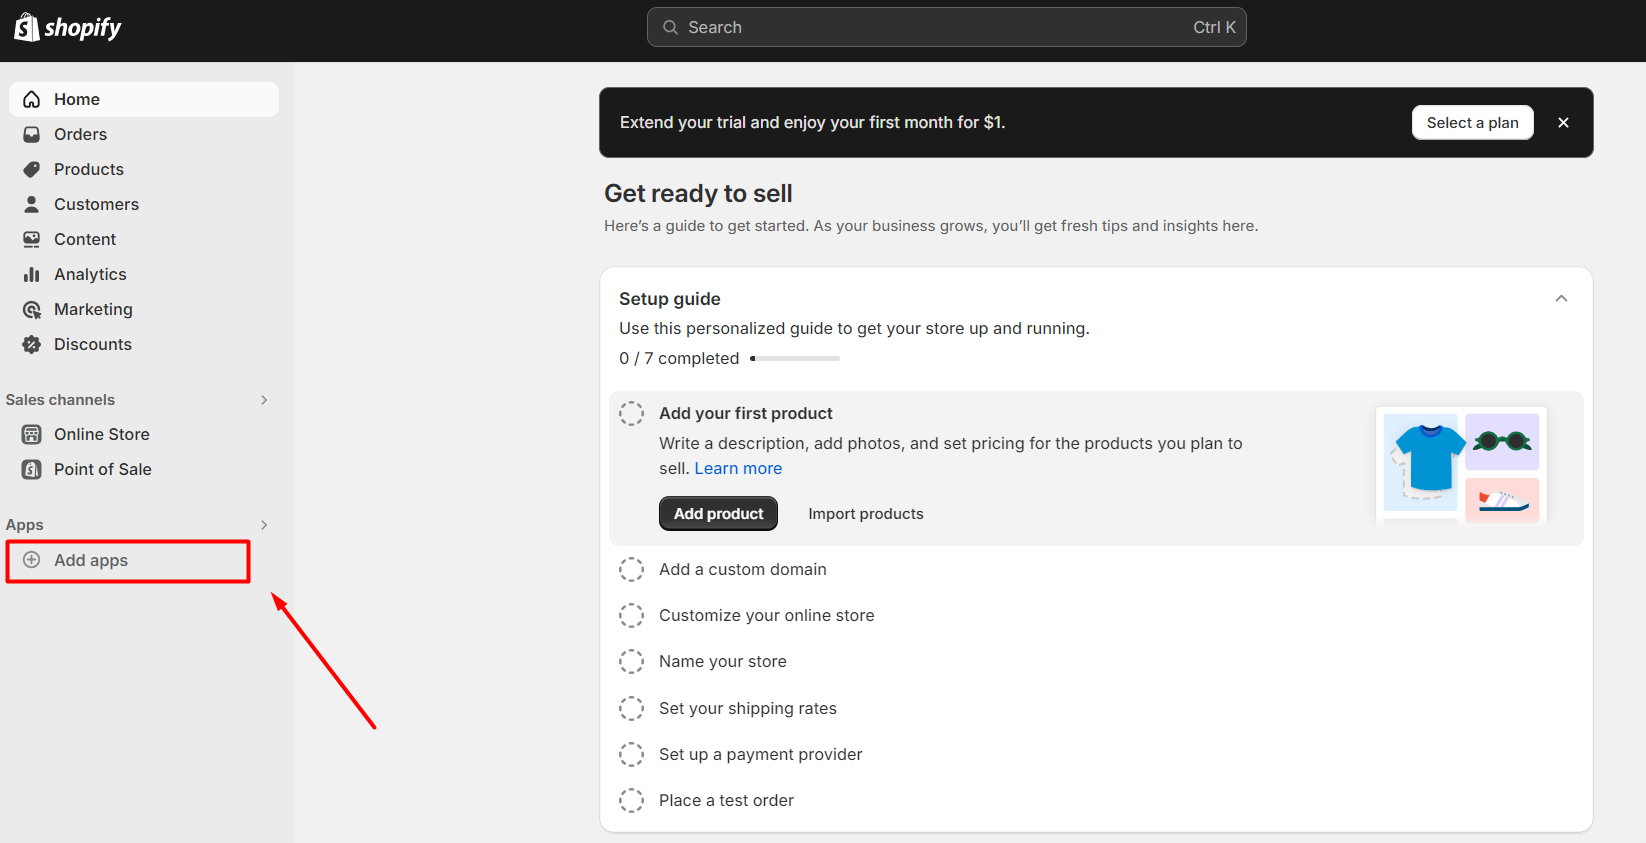
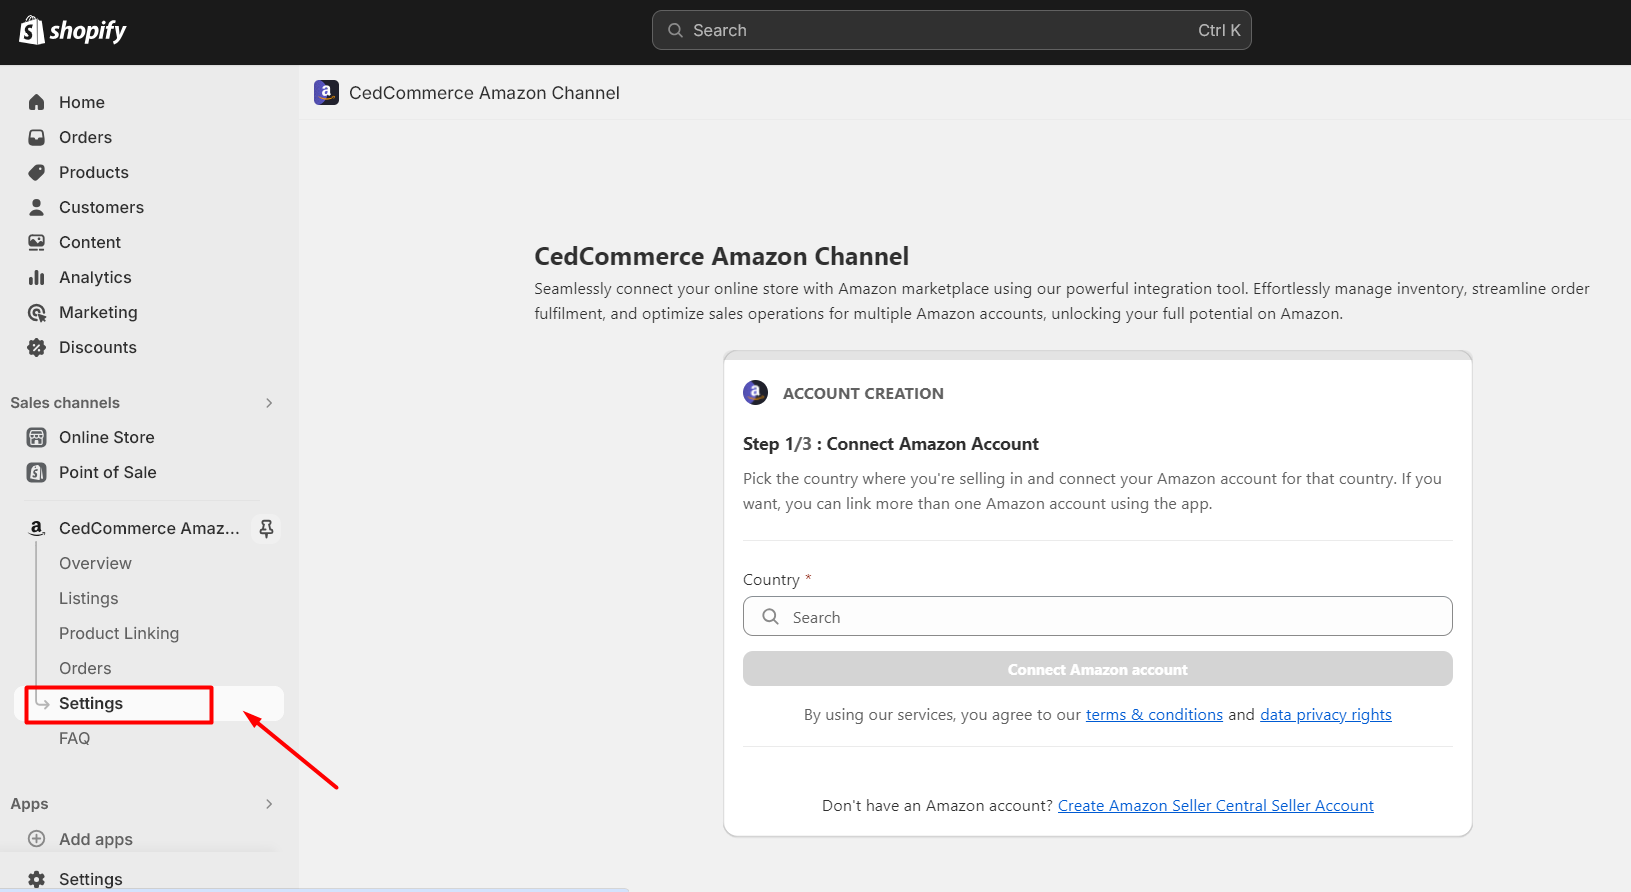
Step 4: Add Amazon as a sales channel on Shopify
Firstly, you need to go to your Shopify admin dashboard and find the “Apps” section in the menu on the left. Then, click “Add app” to add a new sales channel.
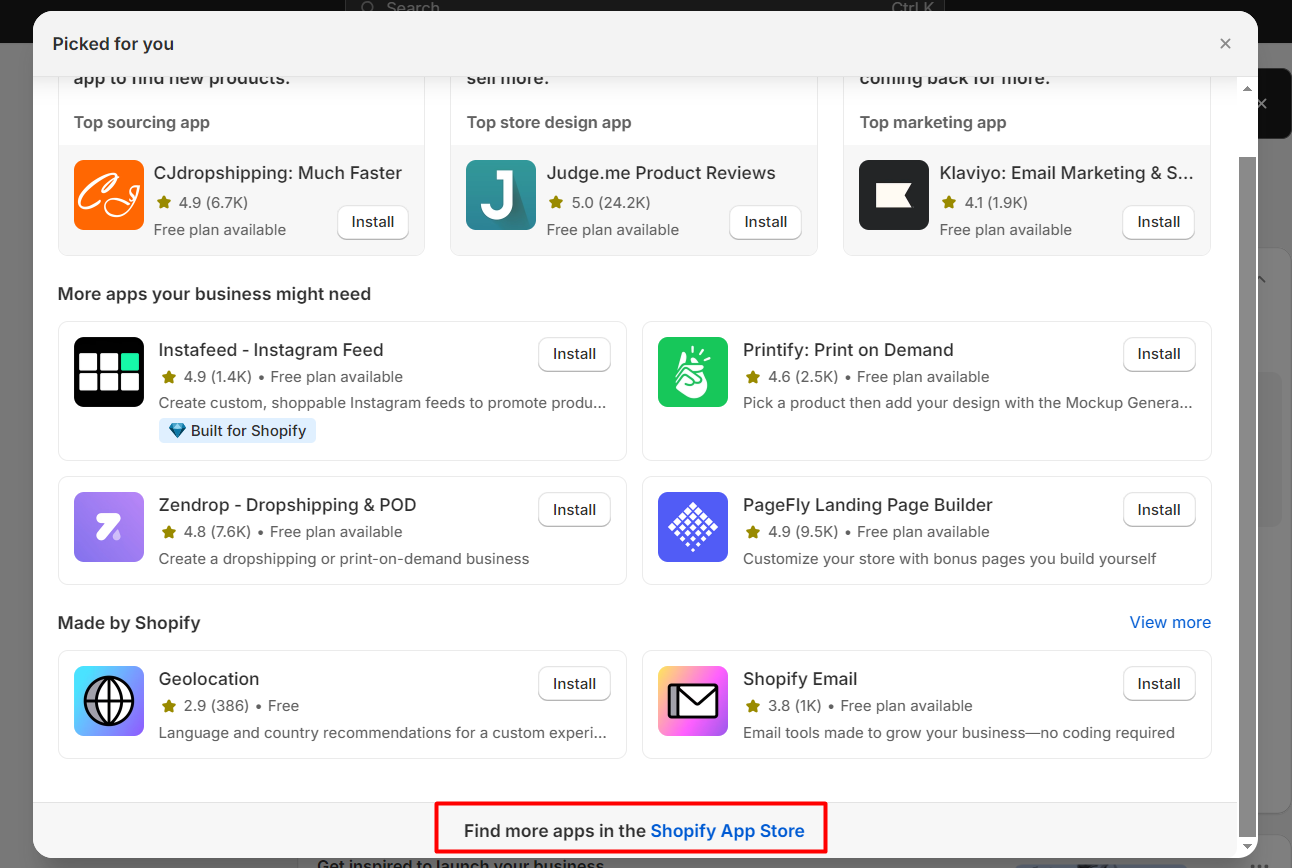
You can choose “Shopify App Store” to find more apps. After that, search for the keyword “Amazon” and add apps to your Shopify store.
Next, you need to select the “Connect account” option to link your Shopify account to your Amazon seller account.
After logging into your Amazon account, you need to authorize Shopify to access your Amazon seller account. Click “Authorize” to proceed. Follow the on-screen instructions to complete the setup. This may involve selecting which Amazon marketplace you want to sell on, adjusting settings, and ensuring your products are correctly matched.
Step 5: Create your Amazon listings
Go to the Amazon app on your Shopify dashboard and click “Listings” to create your product listings. There are typically two ways to link your Shopify products with the Amazon app:
- Manually create Amazon listings and map them to existing Shopify products.
- Use the automatic product syncing feature to sync Shopify products directly with Amazon listings.

If you are new to the Amazon app, you need to list your Shopify products on Amazon to start selling. This involves selecting which products you want to sell and categorizing them correctly. You can add products one by one or in bulk, depending on your preference.
For those who have used Amazon before, linking your Amazon and Shopify products can be easier. To link individual Amazon listings to Shopify, simply choose the product listings you wish to sync and start the process. After syncing, match the corresponding Shopify product to the Amazon ASIN or SKU. The system will then link the selected Amazon listings to the corresponding Shopify items in your store.
Step 6: Manage Inventory
When you integrate Shopify with Amazon, managing inventory means ensuring you have accurate stock levels on both platforms. This helps you avoid overselling items you don't have in stock. You can use an Amazon integration app to automatically sync inventory levels between Shopify and Amazon. Whenever a product is sold on one platform, the inventory is updated on the other platform in real time.
- Regularly check your stock levels on both Shopify and Amazon to identify any discrepancies or issues early.
- Monitor high-demand items and adjust stock levels accordingly to prevent running out of stock.
- If needed, manually adjust the inventory levels in Shopify or Amazon Seller Central to correct mistakes or update stock quantities.
- If you’re running low on stock, set up rules to prioritize sales to certain customers or sales channels based on your criteria.
By following these inventory management practices, you can ensure your stock remains synced between Shopify and Amazon. This will help minimize the risk of running out of products and provide a smoother shopping experience for your customers on both platforms.
Step 7: Complete Amazon Orders
To process Amazon orders in Shopify, go to your Shopify admin dashboard, click on “Settings”, then select “Order settings”. You will find your Amazon orders listed alongside those from your Shopify store.
When a customer makes a purchase, the app you installed will send all the order details to your Shopify account. This includes information on what the customer bought, where it should be shipped, and their contact details. You can view and manage these orders either within the app’s order management section or directly in the Orders section of your Shopify Admin.
Next, complete the order in Shopify. You’ll have the option to choose between Fulfillment by Amazon (FBA) or Fulfillment by Merchant (FBM), depending on how you manage your inventory and operate your business.
- Fulfillment by Amazon (FBA): If you use FBA, the app sends the order details directly to Amazon. Amazon will handle the packing, shipping, and delivery of the order to your customer.
- Fulfillment by Merchant (FBM): If you’re using FBM, you’ll need to fulfill the order yourself. This includes creating the shipping label, packing the order, and shipping it to the customer using your preferred shipping company.
Step 8: Monitor and Optimize Performance
Once your Shopify products are listed on Amazon, it’s crucial to monitor your sales, inventory, and customer feedback on Amazon. Adjust your product listings, pricing, and order fulfillment strategies to improve your performance and increase sales on both platforms.
To stay compliant with Amazon’s standards, take the time to thoroughly read and understand Amazon’s policies and procedures. Additionally, make the most of the features and tools offered by your chosen Amazon integration app to optimize your selling strategy and drive success across both platforms.