
Order Status indicates the state of an order during the handling process. It notifies both customers and store owners about the order progress, for instance, where the order is, whether it has been packed, shipped, or paid, etc. Magento 2 stores need to create order status to manage orders effectively, as well as build a professional image to customers. This post will refer to how to create custom order status in magento 2.
In the configuration, you can create a new one, assign it to the order state, set it as the default status for that state, or remove it. Let’s check the overview below.
4 Steps to Custom Order Status in Magento 2 :
Step 1: Create Custom Order Status
First, you can add a new order status :
- On the Admin Panel,
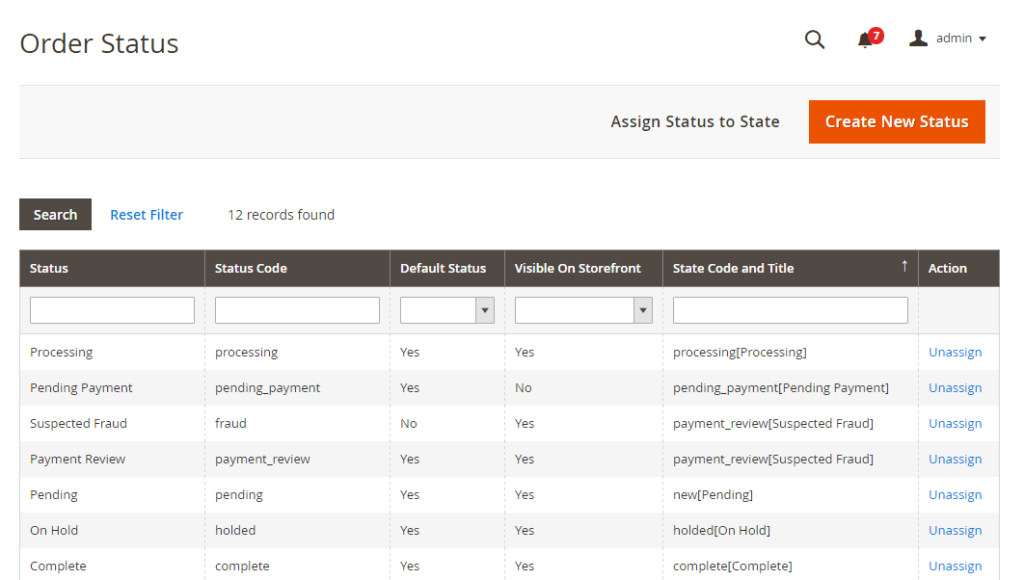
Stores > Settings > Order Status. - In the upper-right corner, click on
Create New Status.
- Under
Order Status Informationsection,- Insert a
Status Codefor the internal reference.
- Set the
Status Labelfor Admin and storefront.
- Insert a
- Set the
Store View Specific Labelsfor each store view on your store. Save Statusto complete.

Step 2: Assign an order status to a state
Next, you will assign that status to an existing state:
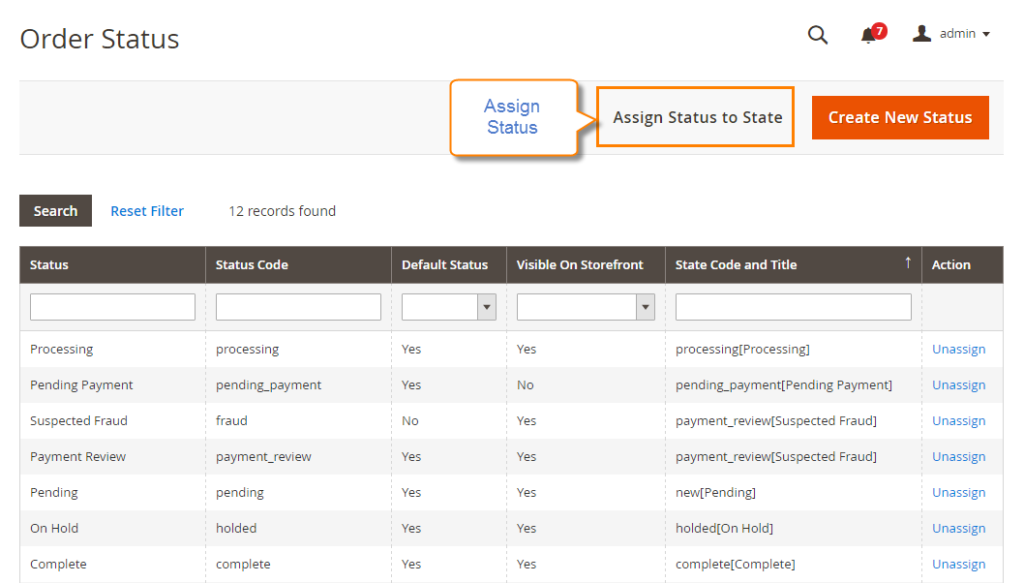
- Go to the
Order Statuspage, click onAssign Status to Statebutton.
- In the Assign Order Status to State section,
- From the existing list of the order status, select the
Order Statusto assign. - Choose the
Order Stateto include the order status you’ve just assigned. - Accept the order status as a default status, tick the
Use Order Status as Defaultcheckbox. - Enable the order status on the storefront, please tick the
Visible On Storefrontcheckbox.
- From the existing list of the order status, select the
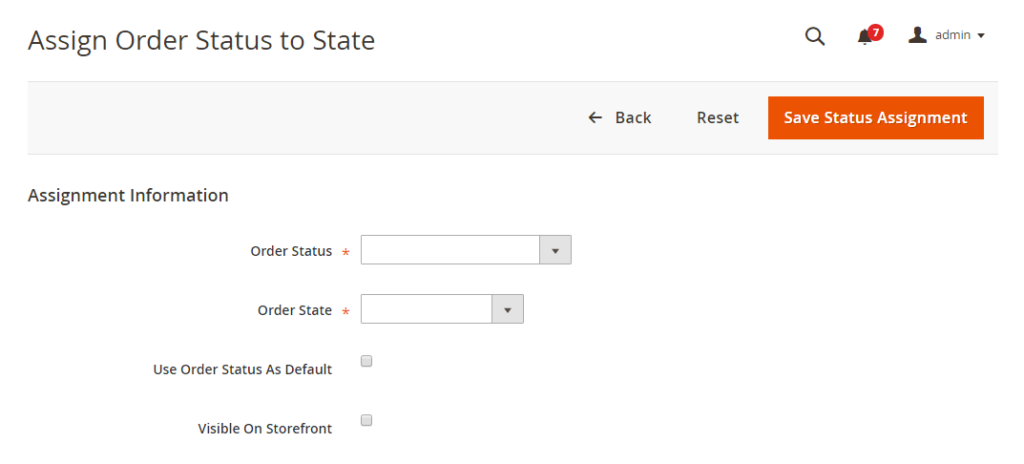
- Click on
Save Status Assignmentto complete.
Step 3: Custom an existing order status
You can edit information of any existing order status
- Find the order status in the status list, and open the edit page.
- Customize any order status information as you need.
- Click on
Save Statusto save the changes.
Step 4: Remove an order status from the current state
It is possible to remove order status, but for the currently used one, you have to disable it first.
You cannot remove the order status that is being used.
- Find the order status that you want to unassign in the status list.
- Under the
Actioncolumn, on the corresponding row, click on theUnassignlink.
Right after that, a notification of the assignment will appear at the top of the workplace. Although the order status is unassigned, it is still included in the gird and never deleted.
Final words
Thanks to the custom order status, customers can track their detailed order progress by themselves, and admins can manage orders with ease. With the above 4 quick steps, creating Custom Order Status becomes easy for any store. Comment down below or chat with us if you have any difficulties in configuration.
Related topics
- Order Status Workflow
- Add Order ID, Customer IP Address in Invoice
- Enable or disable reorders
- RSS Feed: Order Status Notification
- Orders and Returns Widget
- Order Status and Order State
- Change Invoice, Order PDF template
- Free magento Delete Orders extension
- Magento Delete test orders
- Magento 2 Custom Order Number