Vyrä Theme – Complete Documentation
Extension Installation
For Magento Marketplace Customers
-
Find the Composer name and version of the extension in the extension's
composer.jsonfile. -
Login to your SSH and run:
composer require mavenbird/themeconfig- Wait for Composer to finish updating your project dependencies and ensure there are no errors.
-
To verify that the extension installed properly, run the command:
php bin/magento module:status Mavenbird_ThemeConfig- By default, the extension is probably disabled.
- Enable the extension and clear static view files:
php bin/magento module:enable Mavenbird_ThemeConfig --clear-static-contentphp bin/magento setup:upgrade- For Magento version 2.0.x to 2.1.x:
php bin/magento setup:static-content:deploy - For Magento version 2.2.x & above:
php bin/magento setup:static-content:deploy --f php bin/magento cache:flush
For Mavenbird Customers
- Extract the zip folder and upload our extension to the root of your Magento 2 directory via FTP.
- Login to your SSH and run the following commands step by step:
php bin/magento setup:upgrade- For Magento version 2.0.x to 2.1.x:
php bin/magento setup:static-content:deploy - For Magento version 2.2.x & above:
php bin/magento setup:static-content:deploy --force php bin/magento cache:flush
Introduction
- List of supported industries: Fashion, Furniture, Cosmetics, Auto Parts, Grocery, Electronics, Footwear, Organics, Wine, Jewelry, Healthcare, Medicine, Fitness & Nutrition.
Industry-Specific Demo Sets
Each demo (Fashion, Furniture, etc.) comes with preconfigured static blocks.
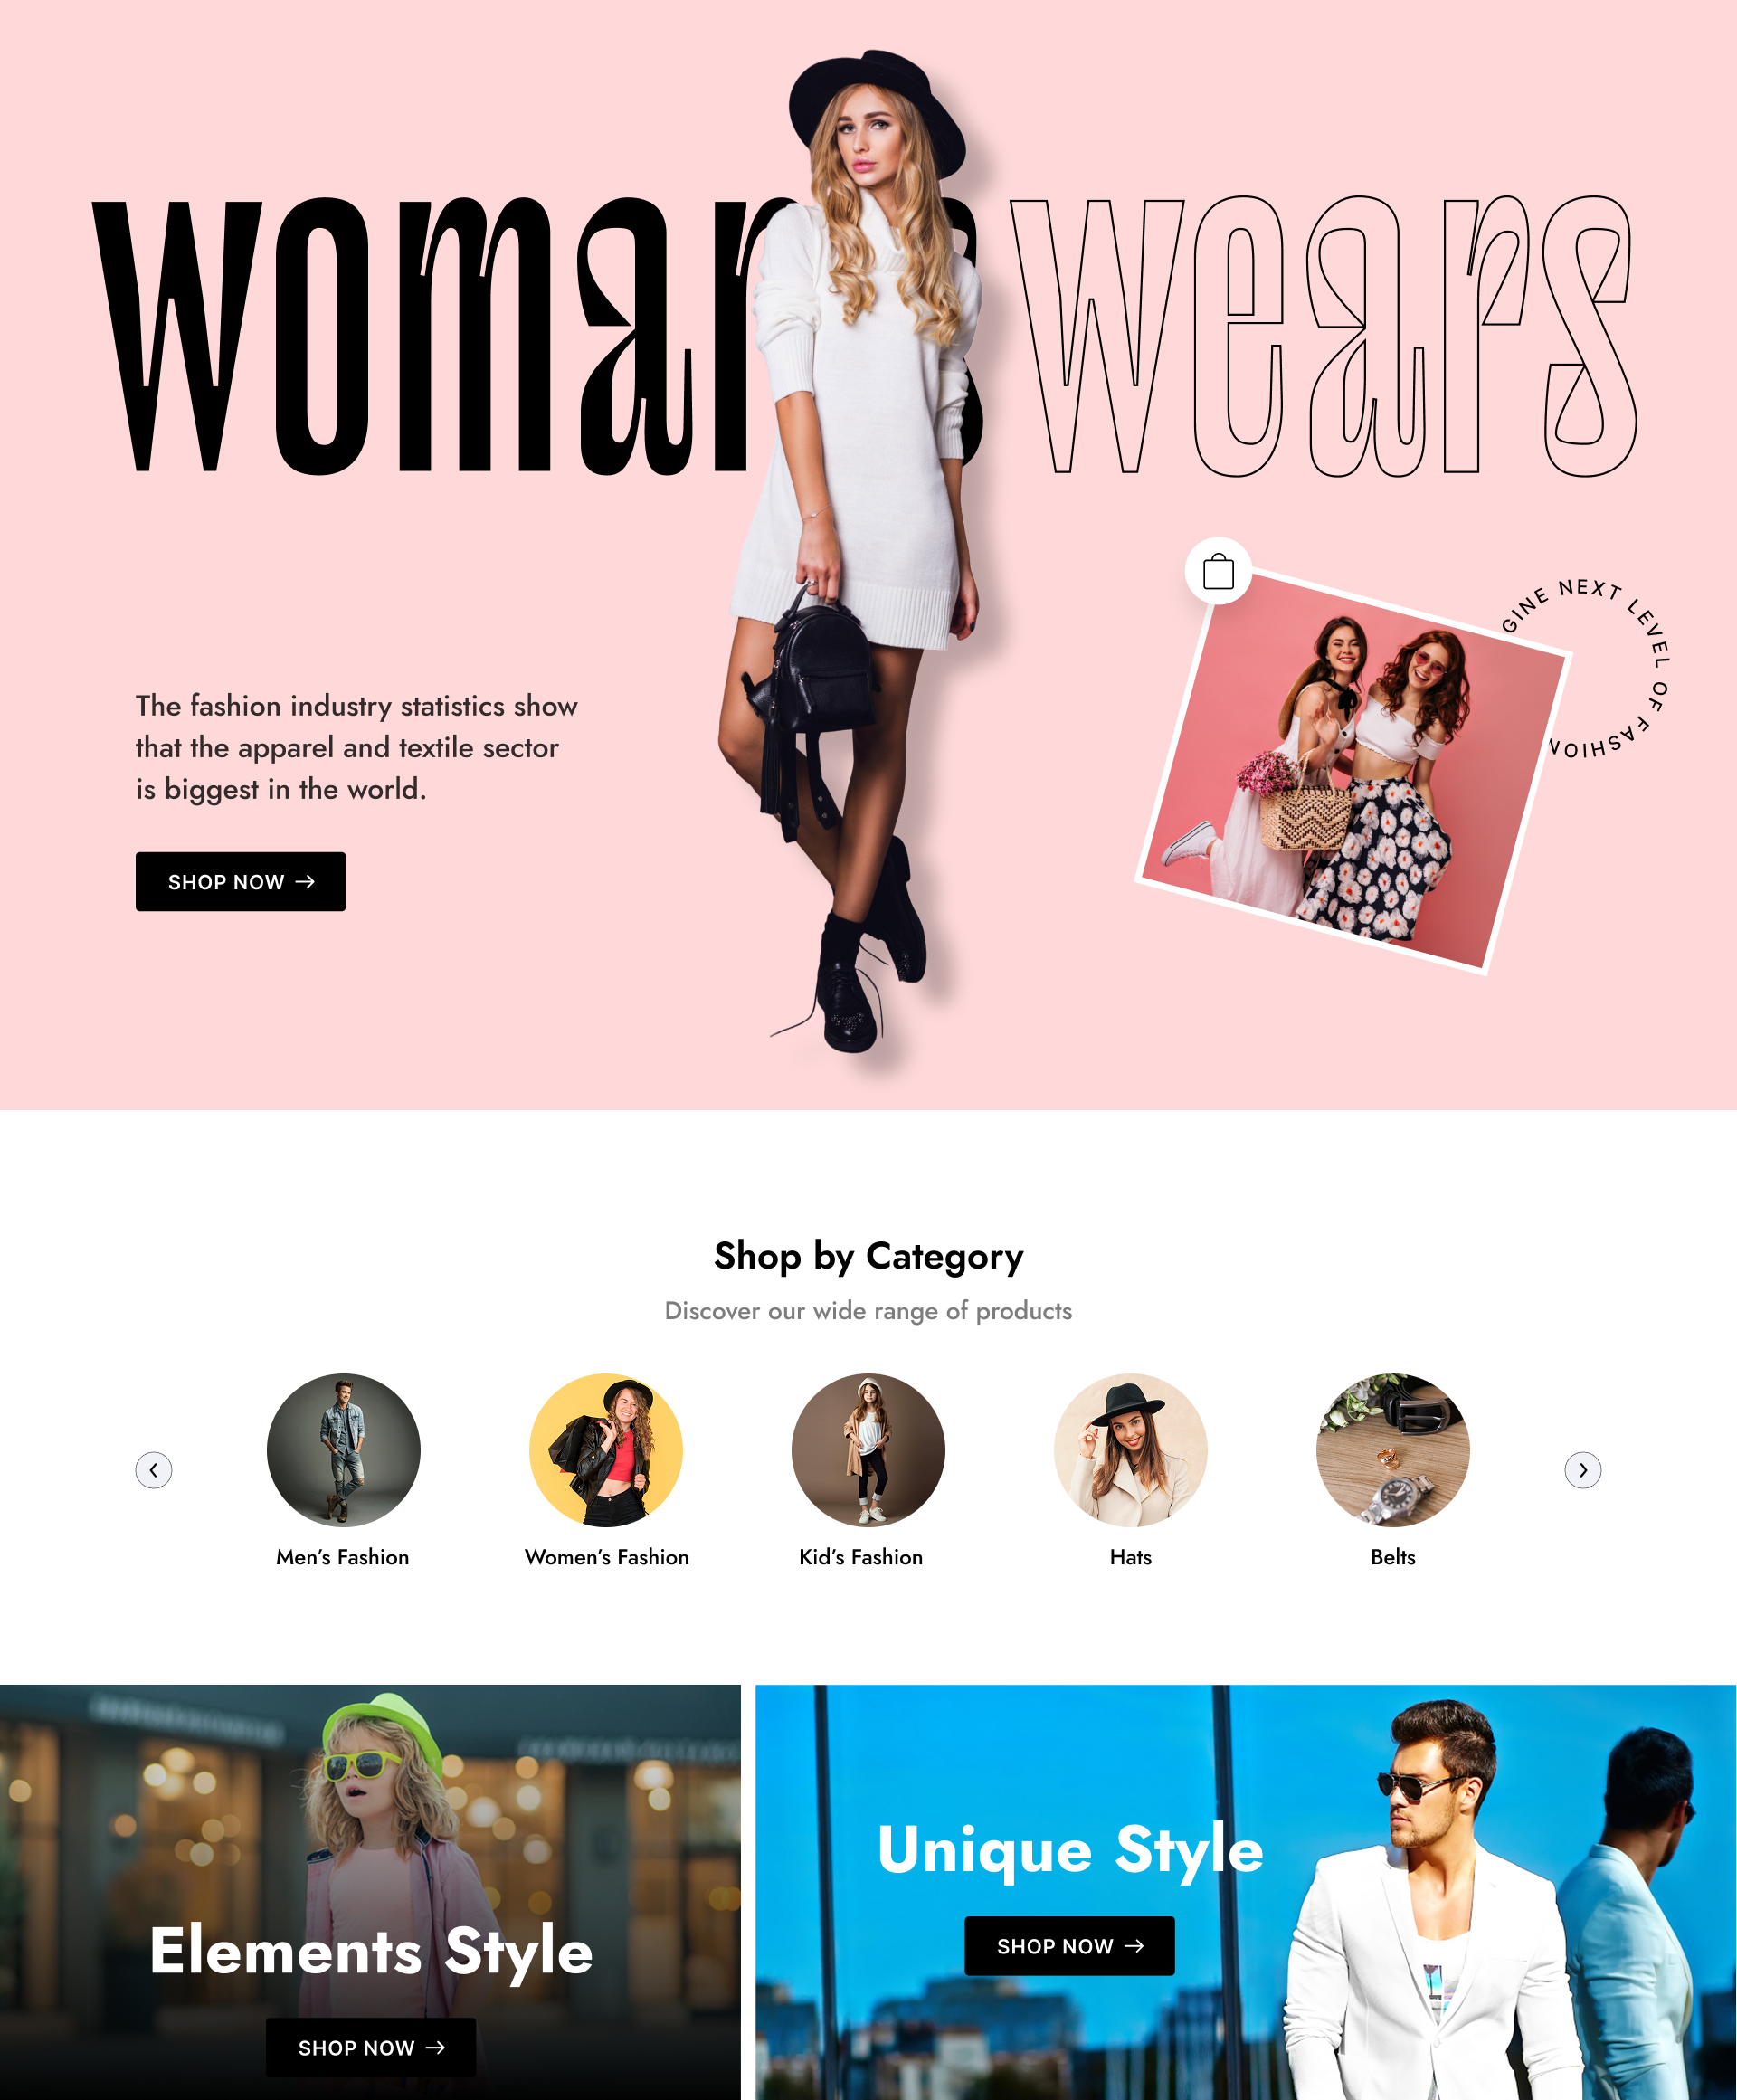
Example: Fashion
- Homepage with banners and trending products.
- Blocks: New Arrivals, Best Sellers.
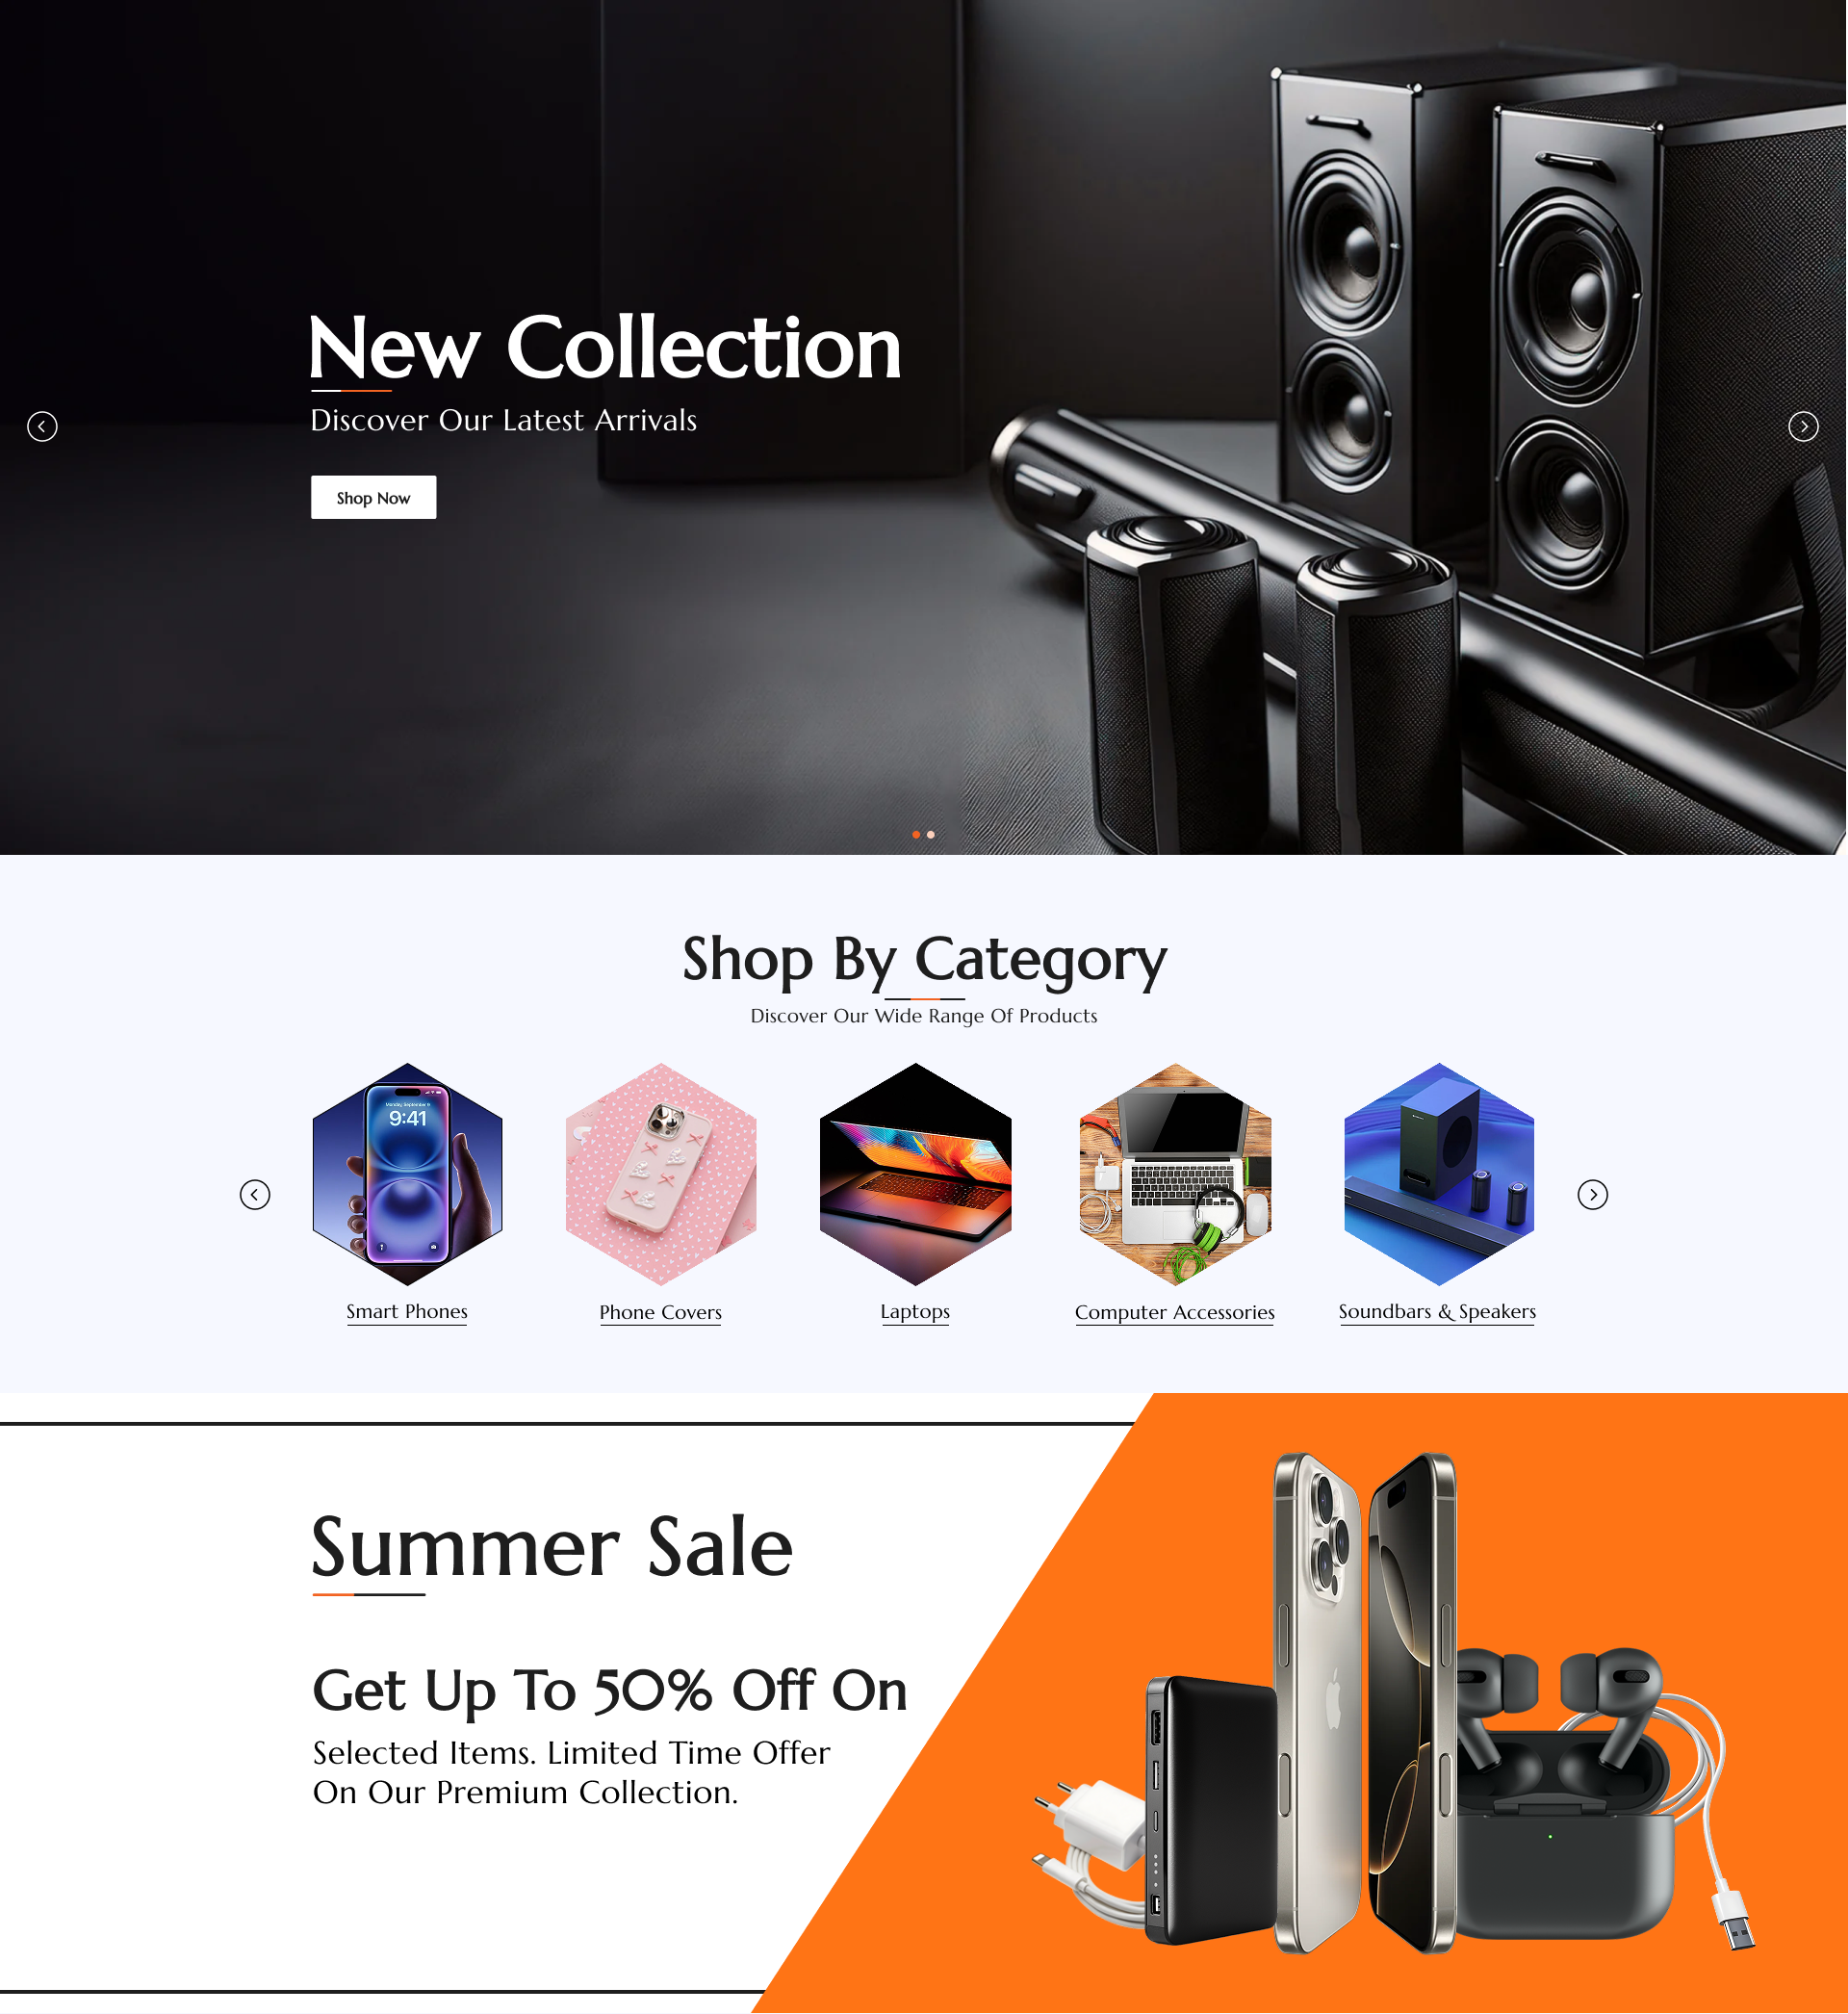
Example: Electronics
- Homepage with category banners.
- Blocks: Top Deals, Featured Products.
Theme Installation & Activation
- Upload theme files
- Copy the Vyrä theme files to
app/design/frontend/Mavenbird/Basein your Magento installation.
- Copy the Vyrä theme files to
- Install the module
- Copy the Vyrä module files to
app/code/Mavenbird/ThemeConfigin your Magento installation. or - Run the following command in your Magento root directory:
composer require mavenbird/themeconfig
- Copy the Vyrä module files to
- Run Magento upgrade
- Execute the following command to register the theme and any new modules:
bin/magento setup:upgrade
- Execute the following command to register the theme and any new modules:
- Apply the theme
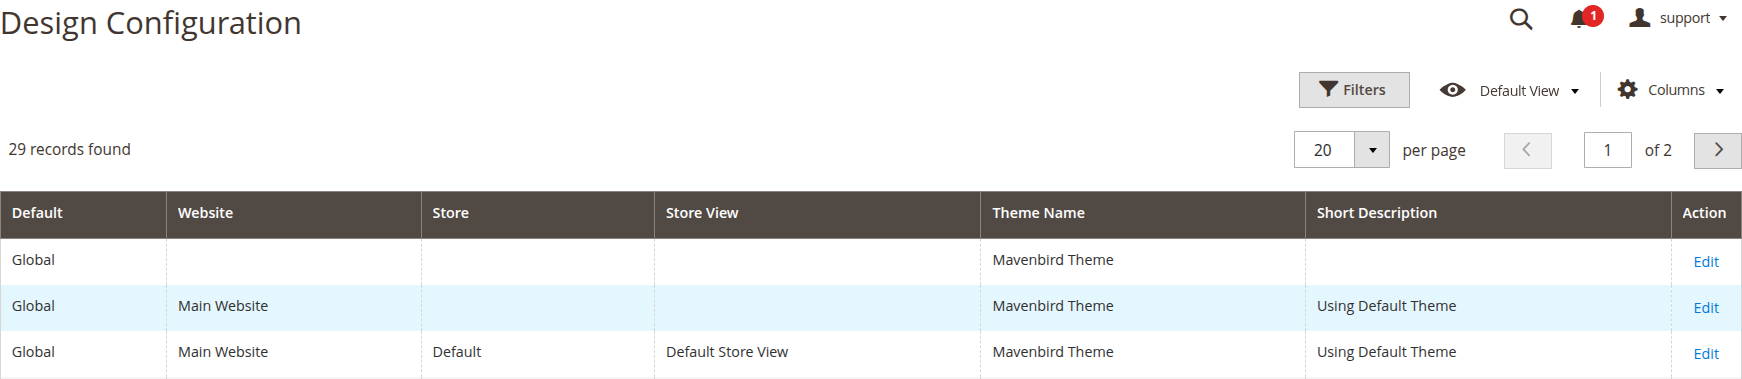
- Go to Admin → Content → Design → Configuration → Edit Store View.
- Select the Vyrä theme for your store view and save the configuration.
- Deploy static content and clear cache
- Run the following commands:
bin/magento setup:static-content:deploy -f
bin/magento cache:clean
- Run the following commands:
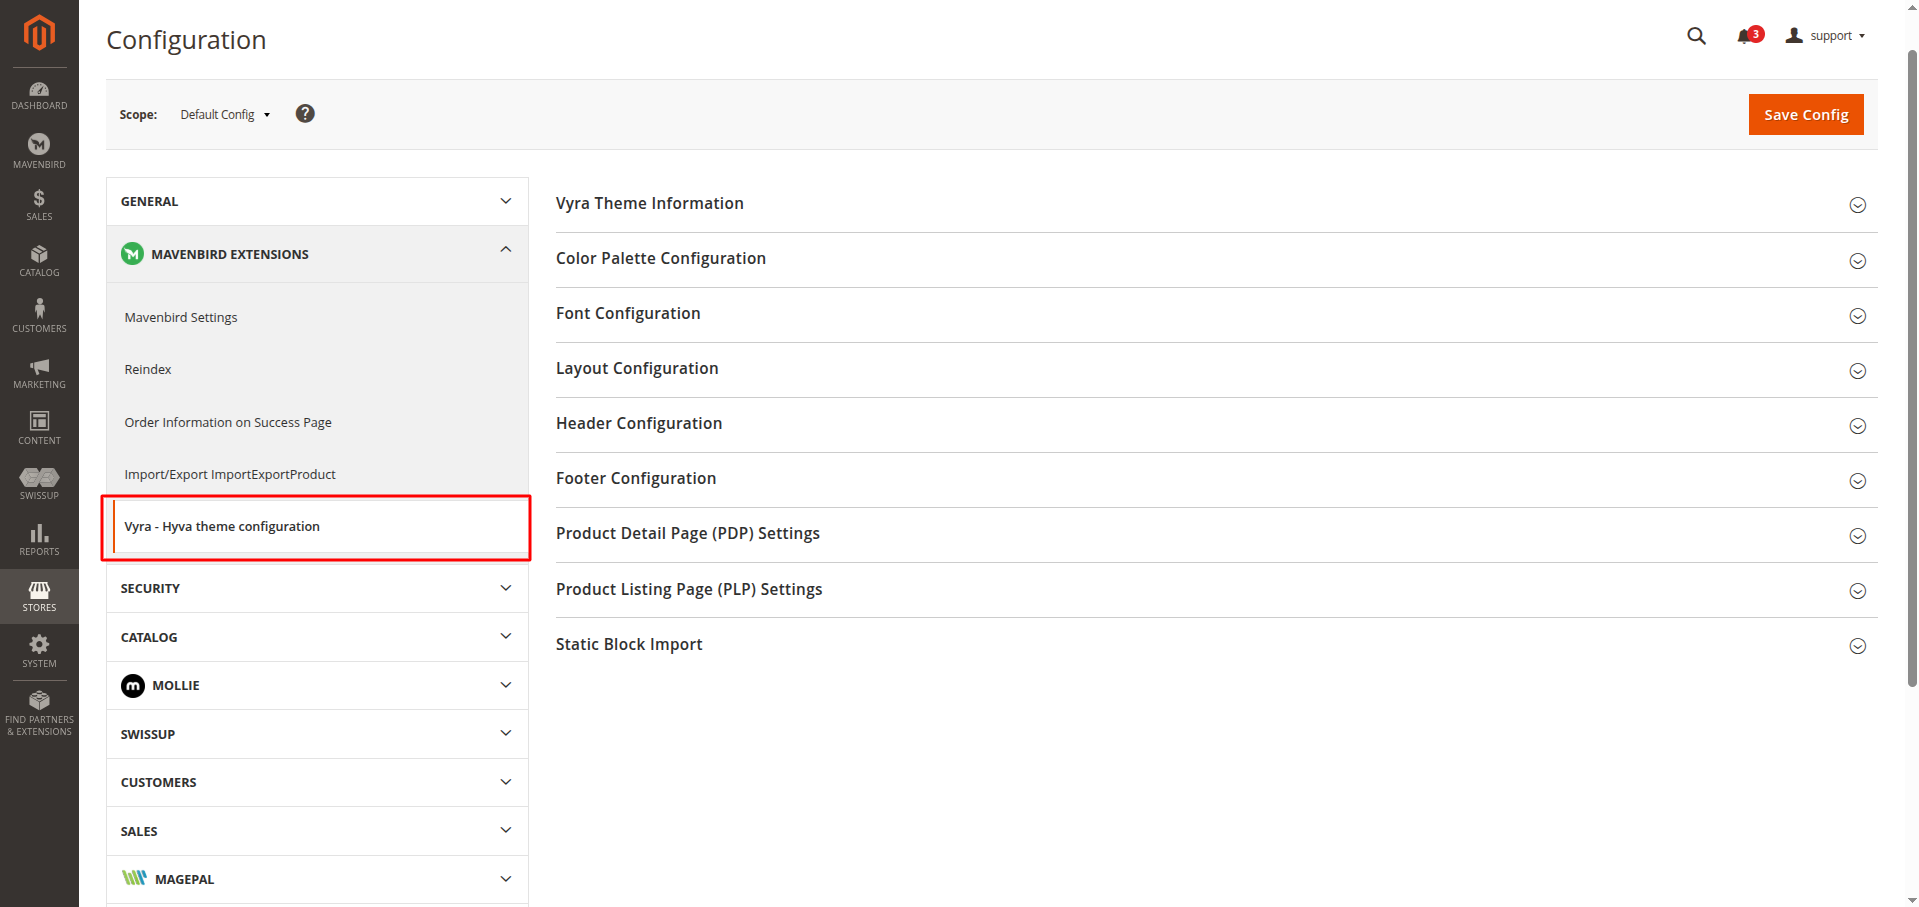
- The theme is configurable via Admin → Stores → Configuration → Mavenbird Extentions → Vyra - Hyva theme configuration.
Theme Customization
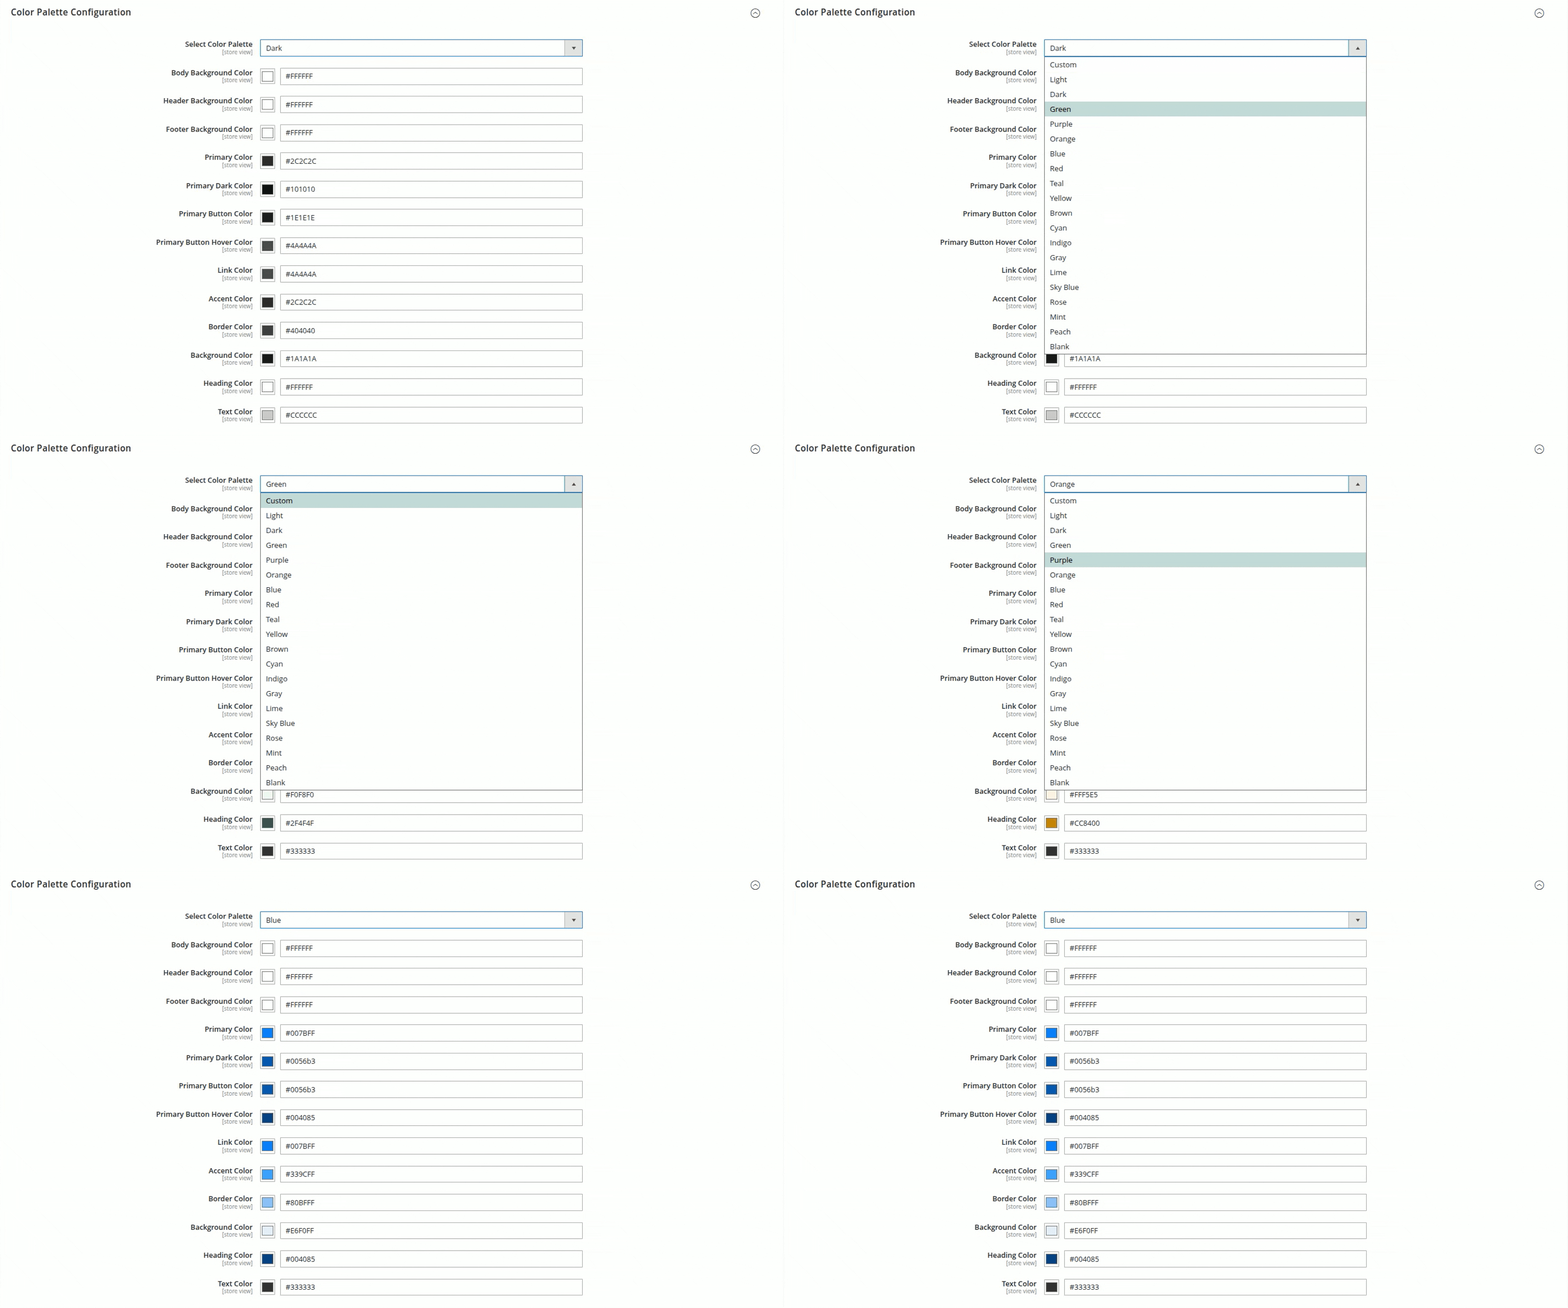
Color Palette Configuration
Users can customize all colors via admin without editing CSS.
Color Palette Options:
- Select Color Palette – Predefined color sets (Light, Dark) or Custom.
- Body Background Color – Controls background of the whole site.
- Header / Footer Background Color – Branding areas.
- Primary / Primary Dark / Accent Colors – Used for buttons, highlights.
- Button Hover Color – Interaction highlight.
- Link Color – Hyperlink text styling.
- Heading / Text Colors – Typography consistency.
- Border / Background Color – Separators, section containers.
When you choose Custom for the color palette, you can manually set every color field to match your brand or design needs. This option gives you full flexibility—no preset colors are applied, so you can select unique values for background, header, footer, buttons, links, text, borders, and more. Save your changes and clear cache to apply your custom palette.
If you are saving the color palette at the Store View or Website View level, first uncheck the "Use Default" or "Use Website" checkbox next to each field before saving.
Font Configuration
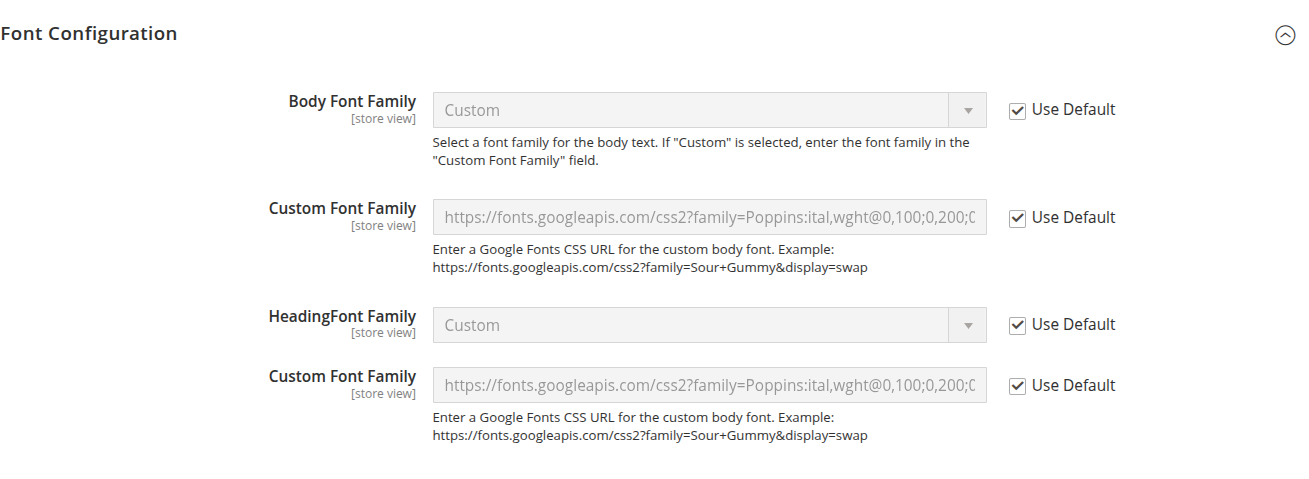
Typography customization via admin.
Font Configuration Options:
- Body Font Family – Default text font.
- Custom Body Font – Insert Google Fonts URL.
- Heading Font Family – For H1–H6.
- Custom Heading Font – Insert Google Fonts URL.
Layout Configuration
Control structural design of pages.
Layout Configuration Options:
- Max Width Container – Define site container width (px or %).

Header Layout Configuration
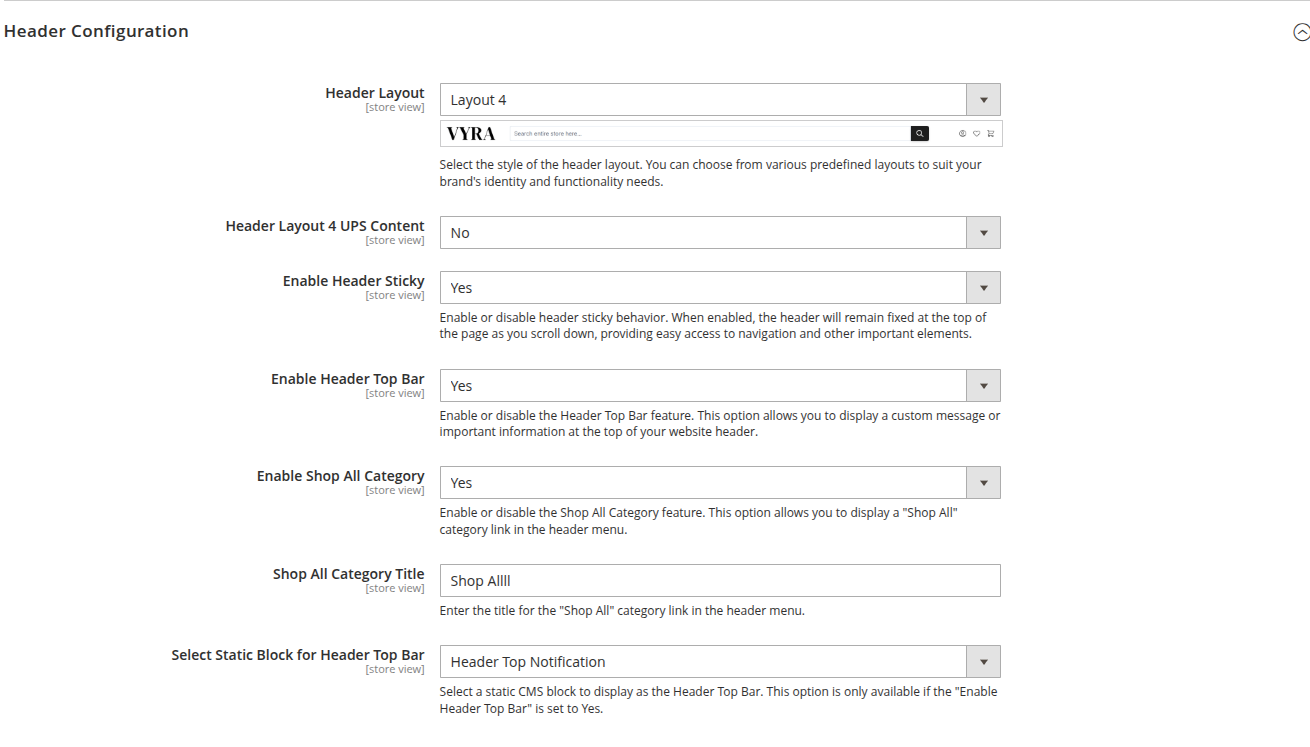
This section allows you to customize the appearance and behavior of your website’s header. Use the options below to tailor the header to your brand and user experience needs.
- Header Layout - Select the style of the header layout. You can choose from various predefined layouts to suit your brand's identity and functionality needs.
- Header Layout 4 UPS Content - Enable or disable header UPS content for Layout 4. This option allows you to display additional content in the header for this specific layout.
- Enable Header Sticky - Enable or disable header sticky behavior. When enabled, the header will remain fixed at the top of the page as you scroll down, providing easy access to navigation and other important elements.
- Enable Header Top Bar - Enable or disable the Header Top Bar feature. This option allows you to display a custom message or important information at the top of your website header.
- Enable Shop All Category - Enable or disable the Shop All Category feature. This option allows you to display a "Shop All" category link in the header menu.
- Shop All Category Title - Enter the title for the "Shop All" category link in the header menu. This will be the text shown for the link.
- Select Static Block for Header Top Bar - Select a static CMS block to display as the Header Top Bar. This option is only available if the "Enable Header Top Bar" is set to Yes.
Footer Configuration
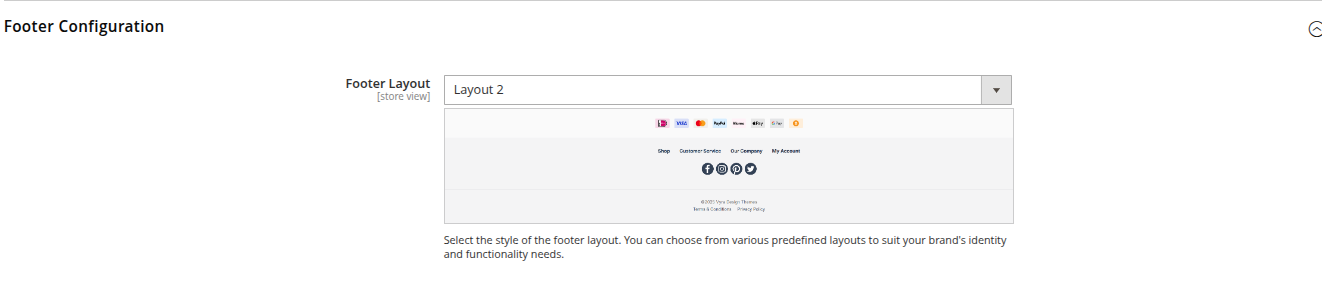
This section allows you to customize the appearance of your website’s footer. Use the options below to select the layout that best fits your brand and site requirements.
Footer Configuration
- Footer Layout - Select the style of the footer layout. You can choose from various predefined layouts to suit your brand's identity and functionality needs.
Product Detail Page (PDP) Settings
This section allows you to configure the layout and features of your product detail pages, helping you optimize the product presentation and user experience.
PDP Settings
-
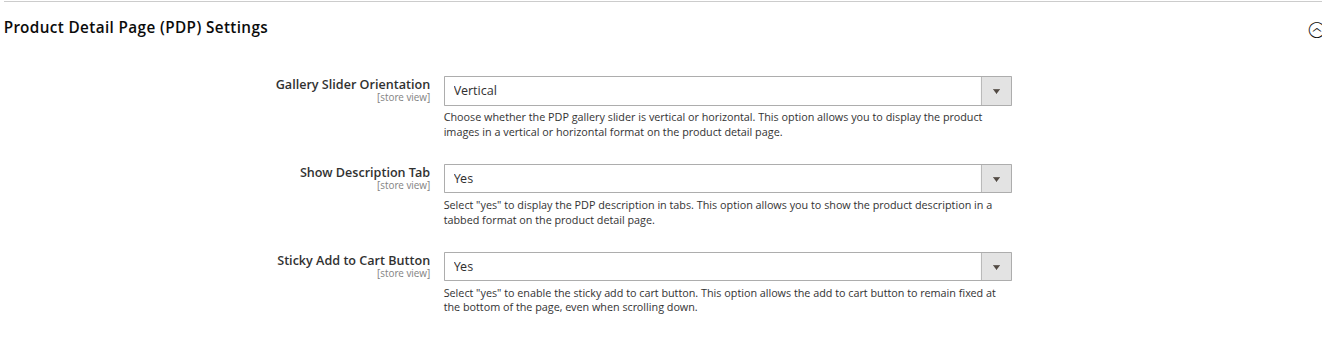
Gallery Slider Orientation - Choose whether the PDP gallery slider is vertical or horizontal. This option allows you to display the product images in a vertical or horizontal format on the product detail page.
-
Show Description Tab - Select "yes" to display the PDP description in tabs. This option allows you to show the product description in a tabbed format on the product detail page. Select "yes" to display the PDP description in tabs. This option allows you to show the product description in a tabbed format on the product detail page.
-
Sticky Add to Cart Button - Select "yes" to enable the sticky add to cart button. This option allows the add to cart button to remain fixed at the bottom of the page, even when scrolling down.
Product Listing Page (PLP) Settings
This section allows you to configure the appearance and features of your product listing pages, helping you create an engaging and visually appealing shopping experience.
PLP Settings
-
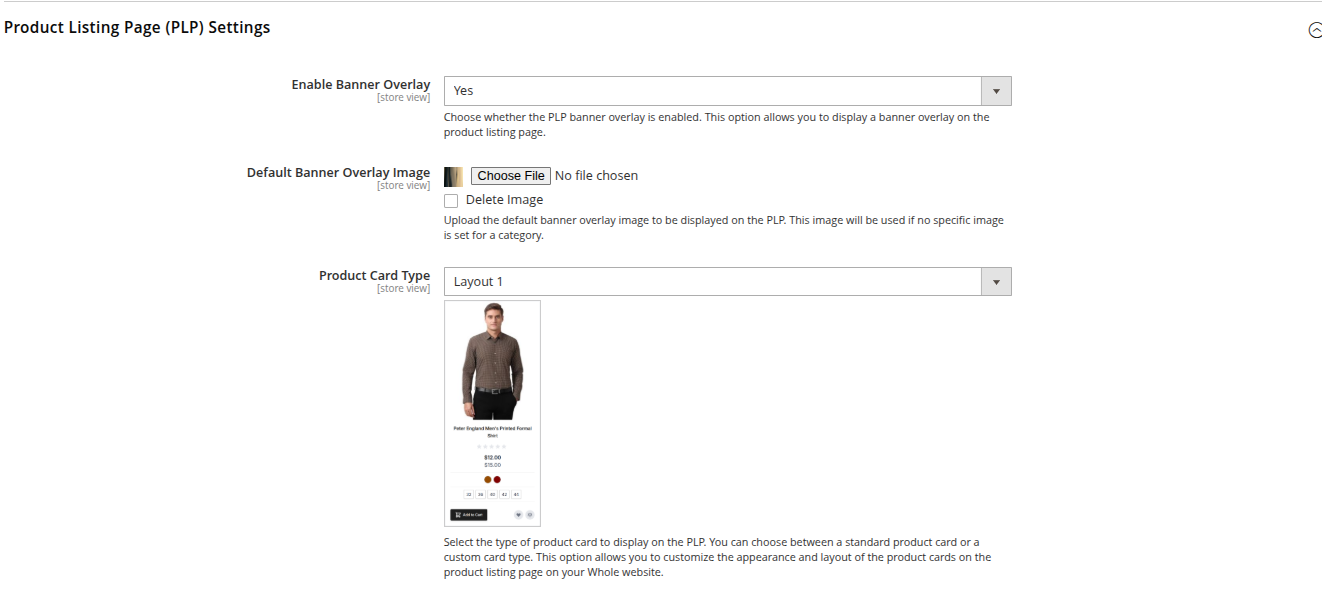
Enable Banner Overlay - Choose whether the PLP banner overlay is enabled. This option allows you to display a banner overlay on the product listing page.
-
Default Banner Overlay Image - Upload the default banner overlay image to be displayed on the PLP. This image will be used if no specific image is set for a category.
-
Product Card Type - Select the type of product card to display on the PLP. You can choose between a standard product card or a custom card type. This option allows you to customize the appearance and layout of the product cards on the product listing page across your whole website.
Static Block Import Configuration:
Used to quickly load demo content depending on industry.
Options Explained:
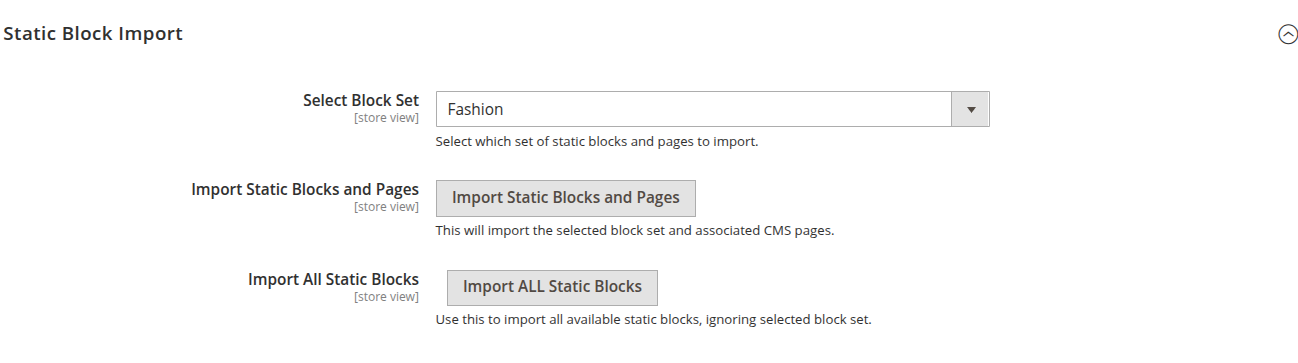
- Select Block Set – Choose demo content type (Fashion, Electronics, etc.).
- Import Static Blocks and Pages – Loads CMS Pages + Blocks.
- Import ALL Static Blocks – Imports everything (Only Import static blocks of all demos which you can use on different demos).
- Set Homepage – After importing demo content, go to Admin → Content → Pages, find the desired homepage (e.g., "Home Fashion", "Home Electronics"), and set it as the default homepage in Stores → Configuration → General → Web → Default Pages.
Applying Configurations
Step-by-step:
Go to Admin → Stores → Configuration → Mavenbird → Vyra - Hyva theme configuration.
- Adjust settings in Color Palette, Layout, Fonts.
- Import relevant static blocks.
- Save and clear cache.
- Review changes on frontend.
Best Practices
- Always backup before importing blocks.
- Test color combinations for accessibility (contrast).
- Use Google Fonts that support multiple weights for better design flexibility.
Troubleshooting
- Changes not visible? → Clear Magento cache + browser cache.
- Fonts not loading? → Verify the correct Google Fonts URL.
- Wrong block imported? → Check the block import options.